- First Web Forms application
- Create new project: ASP.NET Web Application
- Select auto generated project in Solution Explorer and select Show
All Files from Project menu
- Expand WebForm1.aspx file node
- Open WebForm1.aspx file, choose HTML view
- Investigate @ Page directive, give attention to Codebehind and Inherits attributes
- Open WebForm1.aspx.cs file, investigate code in section 'Web Form Designer generated code'
- Add MyTrace method to generated class:
private void MyTrace() {
	Response.Write("<br><hr>Headers<br><hr>");
	foreach(string key in Request.Headers.AllKeys)
		Response.Write(String.Format("{0} = {1}<br>",key,Request.Headers[key]));
	Response.Write("<br><hr>Form<br><hr>");
	foreach(string key in Request.Form.AllKeys)
		Response.Write(String.Format("{0} = {1}<br>",key,Request.Form[key]));
	Response.Write("<br><hr>QueryString<br><hr>");
	foreach(string key in Request.QueryString.AllKeys)
		Response.Write(String.Format("{0} = {1}<br>",key,Request.QueryString[key]));
	Response.Write("<br><hr>ServerVariables<br><hr>");
	foreach(string key in Request.ServerVariables.AllKeys)
		if(key!="ALL_HTTP" && key!="ALL_RAW")
			Response.Write(String.Format("{0} = {1}<br>",key,Request.ServerVariables[key]));
}
- Call MyTrace method from Page_Load
- Compile and run the project
- give your attention to debugging properties
- notice that only administrator are able to debug other user's process
- usually You are not a server process owner
- to disable ASP.NET debugging set project property "Configuration Properties\Debugging\Enable ASP.NET Debugging" to False
- Replace code from WebForm1.aspx file with the following: (leave first line contains @Page directive)
Hint - use "Edit\Paste as HTML" in VisualStudio
<HTML>
	<HEAD>
		<title>My first page</title>
	</HEAD>
	<body>
		<form id="Form1" method="post" runat="server">
			<input type="text" name=inputText value="">
			<input type="submit" name=btnSubmit value="Send">
		</form>
	</body>
</HTML>
Compile and run the project, fill textbox with some data and submit page
Replace line
<input type=text name=inputText value="">
with
<input type=text name=inputText value="<%=Request.Form["inputText"]%>">
compile and run the project again, notice difference in Form section
Open your page with parameters
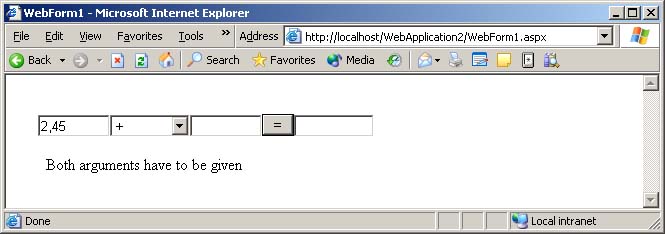
Adding validation process
- Add two RequiredFieldValidator, two RegularExpressionValidator
and one ValidationSummary
- Change their names
- Add following code to Page.Load event handler:
arg1ReqValidator.ControlToValidate="arg1";
arg1ReqValidator.ErrorMessage="Argument 1 is required";
arg1ReqValidator.Display=ValidatorDisplay.None;

arg2ReqValidator.ControlToValidate="arg2";
arg2ReqValidator.ErrorMessage="Argument 2 is required";
arg2ReqValidator.Display=ValidatorDisplay.None;

arg1RegExValidator.ControlToValidate="arg1";
arg1RegExValidator.ErrorMessage="Argument 1 has wrong format";
arg1RegExValidator.ValidationExpression=@"\d+(,\d+)?";
arg1RegExValidator.Display=ValidatorDisplay.None;

arg2RegExValidator.ControlToValidate="arg2";
arg2RegExValidator.ErrorMessage="Argument 2 has wrong format";
arg2RegExValidator.ValidationExpression=@"\d+(,\d+)?";
arg2RegExValidator.Display=ValidatorDisplay.None;

summaryValidator.ShowSummary=false;
summaryValidator.ShowMessageBox=true;
Compile and run the project again
Investigate page source (View Source option in IE browser context menu)
Building login page
Yet another page in your application
- Add new page to existing project (File\Add New Item and select Web Form)
- Add two Label control, one DropDownList control
- Add System.Web.UI.HtmlControls.HtmlInputButton (not System.Web.UI.WebControls.Button)
- Change control names
- Set AutoPostBack property of DropDownList control on True
- Choose HTML view of WebForm3.aspx file
- Insert following code into HEAD section
<script language=javascript>
function SetColors(name) {
	var combo=document.all[name];
	for(var i=0; i<combo.options.length; i++) {
		var o=combo.options[i];
		o.style.backgroundColor=o.value;
	}
}
</script>
this is a client-side code to color options in DropDownList
- Add attributs id and runat to BODY tag:
<body MS_POSITIONING="GridLayout">
<body MS_POSITIONING="GridLayout" id="bodytag" runat="server">
and new field into page's class
protected HtmlGenericControl bodytag;
- Add client-side event handler to HtmlInputButton control:
<INPUT style="..." type="button" value="Calculator">
<INPUT style="..." type="button" value="Calculator" onclick="location='WebForm1.aspx';">
- Use following code as Page.Load event handler:
string name=(string)Session["Name"];
string surname=(string)Session["Surname"];
if(name==null || name.Length==0 || surname==null || surname.Length==0) {
	Response.Redirect("WebForm2.aspx");
}
else {
	caption.Text=String.Format("Hello, {0} {1}",name,surname);
	caption.Font.Size=FontUnit.Medium;
	caption.ForeColor=Color.Orange;

	if(!IsPostBack) {
		backColor.Items.Add("white");
		backColor.Items.Add("red");
		backColor.Items.Add("green");
		backColor.Items.Add("blue");
		backColor.Items.Add("black");

		HttpCookie cookie=Request.Cookies["bgColor"];
		if(cookie!=null && cookie.Value!=null) {
			bodytag.Attributes.Add("bgColor",cookie.Value);
			backColor.SelectedValue=cookie.Value;
		}
	}

	RegisterStartupScript("SetColors","<script>SetColors('backColor');</script>");
}
Add following code to DropDownList Click event handler
bodytag.Attributes.Add("bgColor",backColor.SelectedValue);
HttpCookie cookie=new HttpCookie("bgColor",backColor.SelectedValue);
cookie.Path=Request.ApplicationPath;
cookie.Expires=DateTime.Today.AddDays(7);

Response.Cookies.Add(cookie);
<appSettings>
	<add key="defaultUserName" value="Jan"/>
	<add key="defaultUserSurname" value="Kowalski"/>
</appSettings>
Add following code to Page.Load event handler of login page
txtName.Text=ConfigurationSettings.AppSettings["defaultUserName"];
txtSurname.Text=ConfigurationSettings.AppSettings["defaultUserSurname"];
- User Control
- Add web user control to existing project (File\Add New Item and select Web User Control)
- Add HtmlInputFile control
- Add HtmlImage control
- Add Button control
- Add HtmlInputFile and HtmlImage control mark as 'Run As Server control'
- Set Button text to "Load"
- Add following code to Page.Load event handler:
if(file.PostedFile!=null && file.PostedFile.ContentLength>0) {
	byte[] buf=new byte[file.PostedFile.ContentLength];
	file.PostedFile.InputStream.Read(buf,0,buf.Length);
	Cache[UniqueID]=buf;
}

if(Request.Params[ClientID+"_get"]=="true") {
	object buf=Cache[UniqueID];
	if(buf!=null) {
		Response.Clear();
		MemoryStream ms=new MemoryStream((byte[])buf);
		Bitmap bmp=new Bitmap(ms);
		bmp.Save(Response.OutputStream,ImageFormat.Gif);
		bmp.Dispose();
		ms.Close();
		Response.End();
	}
}

if(Cache[UniqueID]!=null) {
	img.Visible=true;
	img.Src=Request.FilePath+"?"+ClientID+"_get=true";
}
else {
	img.Visible=false;
}
- Put your control on web page
- Compile and run the project
- XML Web Service
- Create ASP.NET Web Service
- Uncomment HelloWorld method example
- Add few methods, get all of them attribute [WebMethod]
- Watch your service directly in web browser
- Using web service
- Add Web Reference...
- Type your service address (http://localhost/WebService1/Service1.asmx)
- Create instance of proxy class generated from web reference
- Call web methods like common object's methods