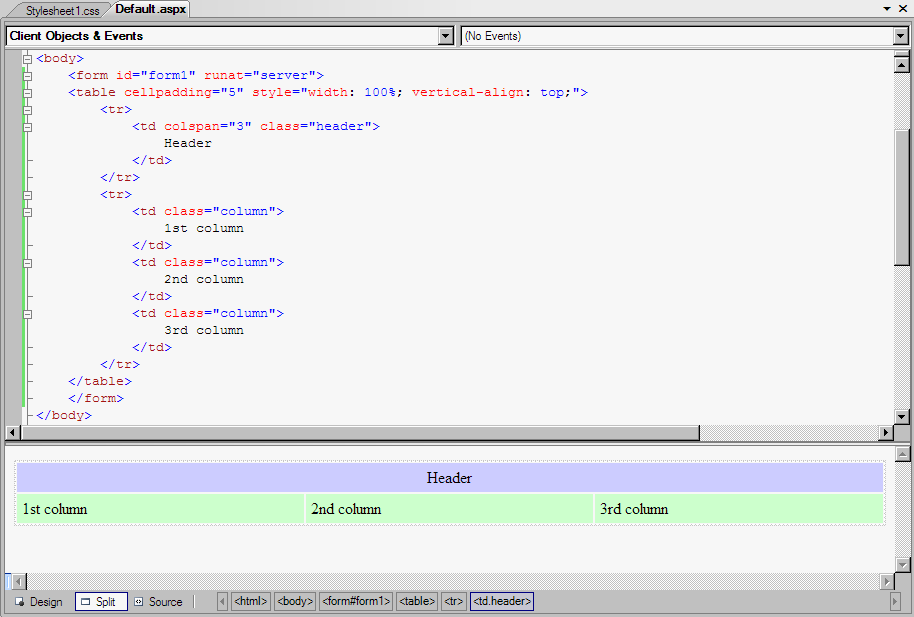
The code:
<table
cellpadding="5"
style="width:
100%;
vertical-align:
top;">
<tr>
<td colspan="3" class="header">
Header
</td>
</tr>
<tr>
<td class="column">
1st column
</td>
<td class="column">
2nd column
</td>
<td class="column">
3rd column
</td>
</tr>
</table>
CSS styles:<tr>
<td colspan="3" class="header">
Header
</td>
</tr>
<tr>
<td class="column">
1st column
</td>
<td class="column">
2nd column
</td>
<td class="column">
3rd column
</td>
</tr>
</table>
.header
{
text-align: center;
background-color: #CCCCFF;
}
.column
{
vertical-align: top;
width: 33%;
background-color: #CCFFCC;
}
{
text-align: center;
background-color: #CCCCFF;
}
.column
{
vertical-align: top;
width: 33%;
background-color: #CCFFCC;
}
- By default, the Personalization-Enabled property of the WebPartManager is set to true. It means, that ASP.NET personalization mechanism based on SQL Server database will be used. To see when it will be necessary, set it to false now.
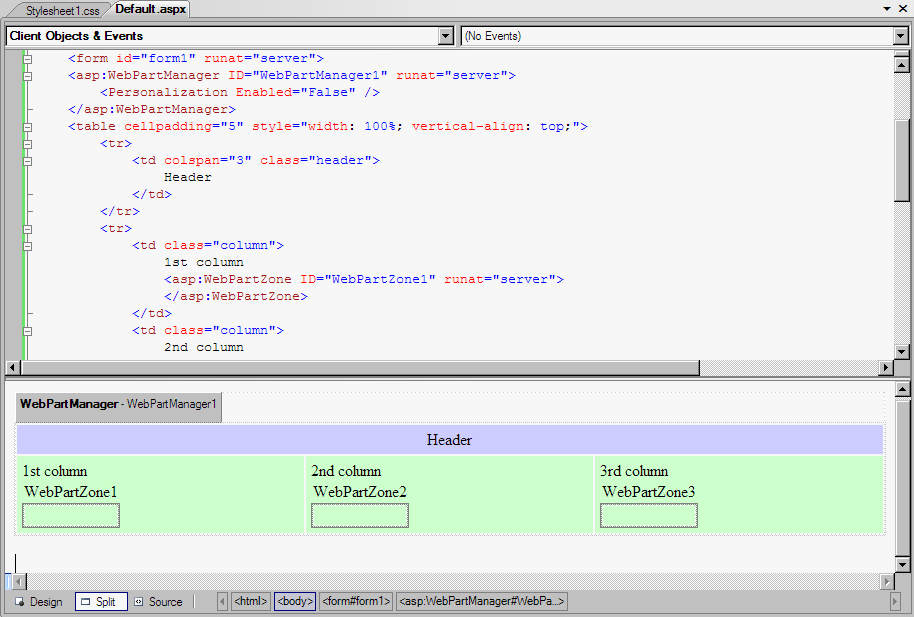
- Note that in the output these added controls are invisible:
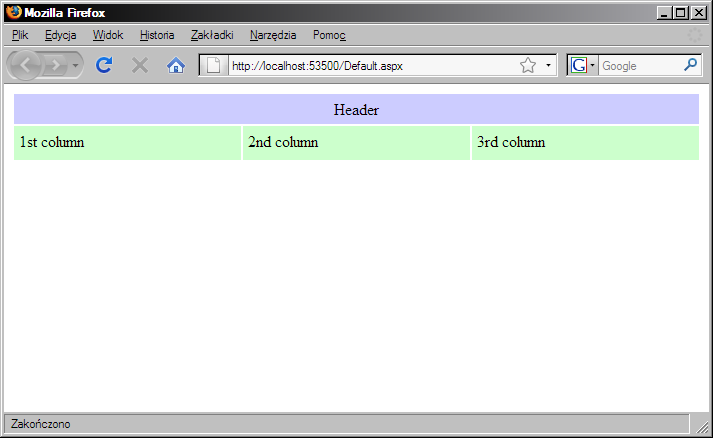
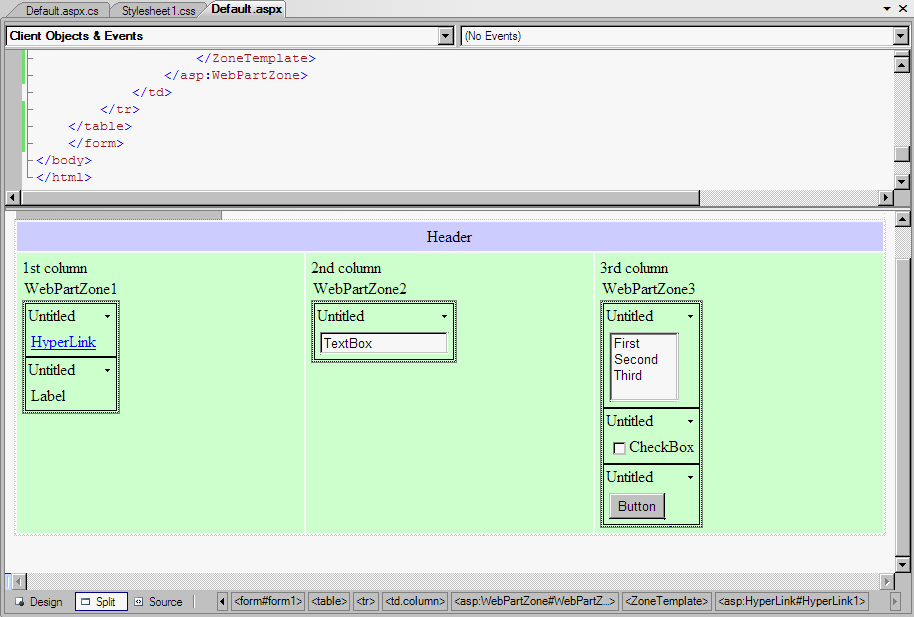
Take a look at the result:
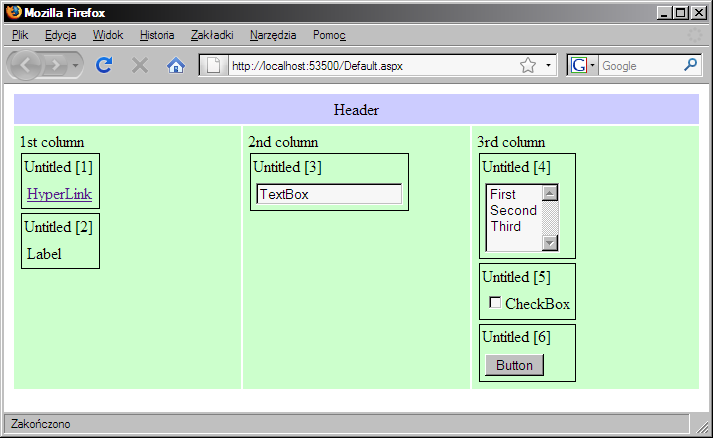
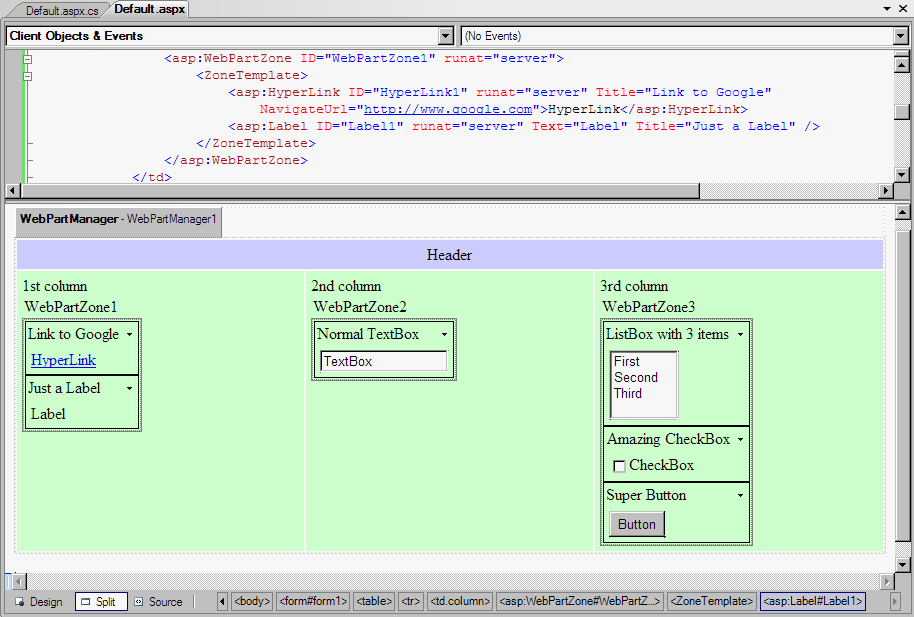
To get rid of these ugly 'Untitled [#]' text, the source code of the page must be manually modified in the Code view. Add a Title property with desired text for each control:
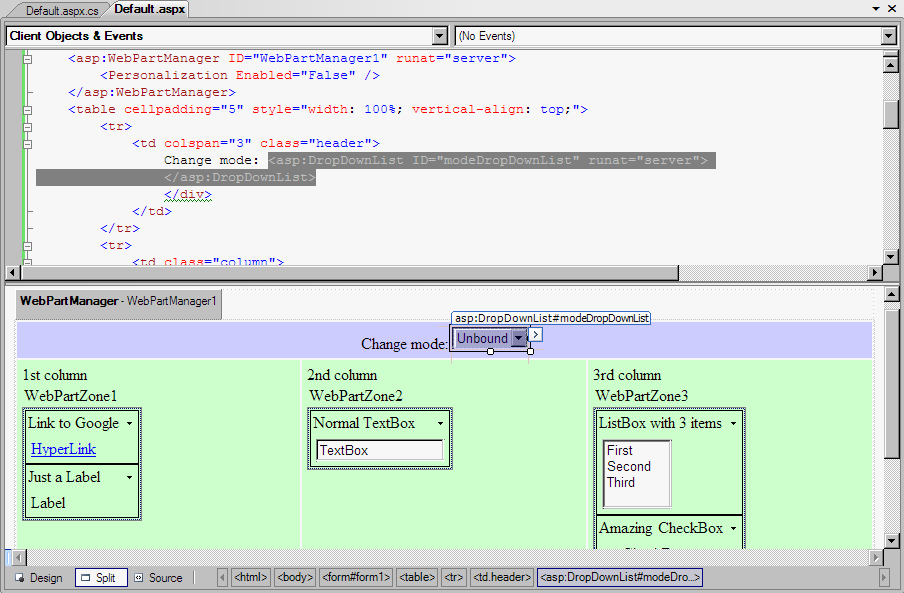
- Add a DropDownList control
where a list of all available modes will be
displayed:
Add code for the Init event of the page to populate dynamically the DropDownList control with names of all available modes:protected void Page_Init(object sender, EventArgs e)
{
if (!IsPostBack)
{
foreach (WebPartDisplayMode mode in WebPartManager1.SupportedDisplayModes)
{
string modeName = mode.Name;
if (mode.IsEnabled(WebPartManager1))
{
ListItem item = new ListItem(modeName, modeName);
modeDropDownList.Items.Add(item);
}
}
}
} - Run the page and note that only one mode is available now:
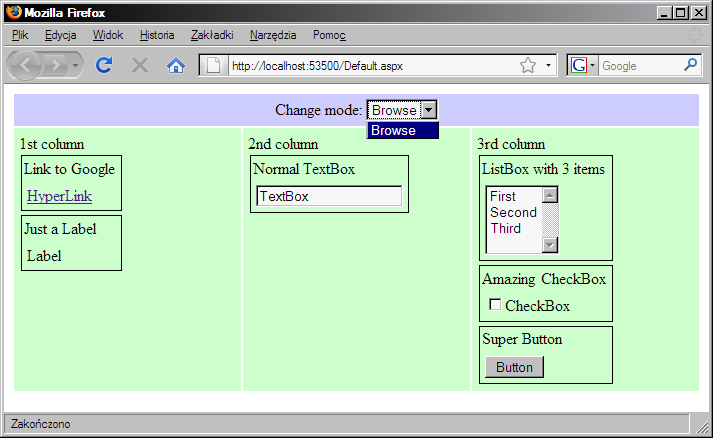
- Set the Personalization-Enabled property of the WebPartManager1
control to true:<asp:WebPartManager ID="WebPartManager1" runat="server">
<Personalization Enabled="True" />
</asp:WebPartManager> - Note that personalization requires a personalization provider. The default provider uses SQL Server 2005 Express Edition, so a working instance of this server is required now (by default, the ./SQLEXPRESS instance is used, so everything should start working automatically).
- Run the page and note the difference:
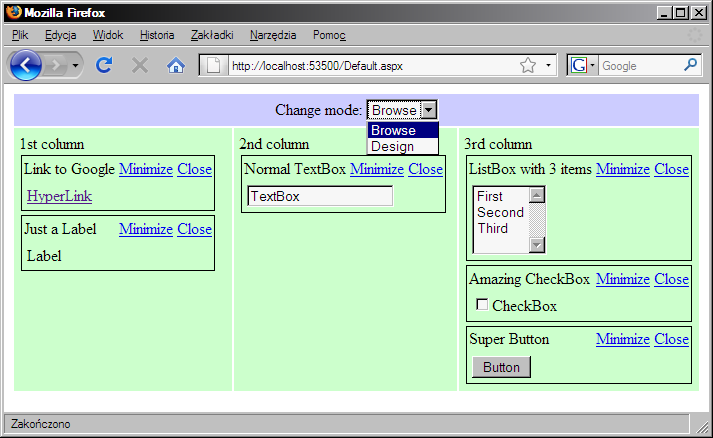
In Internet Explorer it may look differently: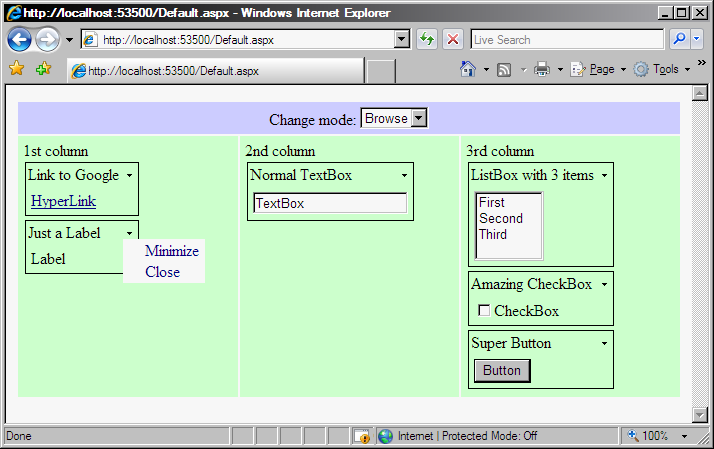
- The Design mode is on a list of supported modes.
- In addition, for each control added to any WebPartZone control to links appeared: Minimize and Close.
- Note also that in the project's App_Data folder an SQL Server database was created automatically - ASPNETDB.MDF.
- In response for the SelectedIndexChanged event
of the modeDropDownList control, set the chosen mode in the
WebPartManager.protected void modeDropDownList_SelectedIndexChanged(object sender, EventArgs e)
{
string newMode = modeDropDownList.SelectedValue;
WebPartDisplayMode mode = WebPartManager1.SupportedDisplayModes[newMode];
if (mode != null)
{
WebPartManager1.DisplayMode = mode;
}
} - To make a postback after changing the selected item in the list, set the AutoPostBack property of the modeDropDownList control to true.
- In the Design mode, the user can drag and drop controls between
zones:
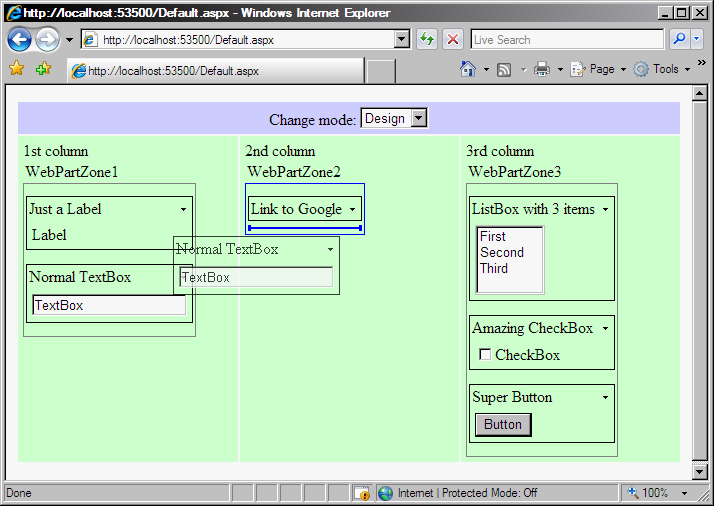
Unfortunately, this feature works in Internet Explorer only.
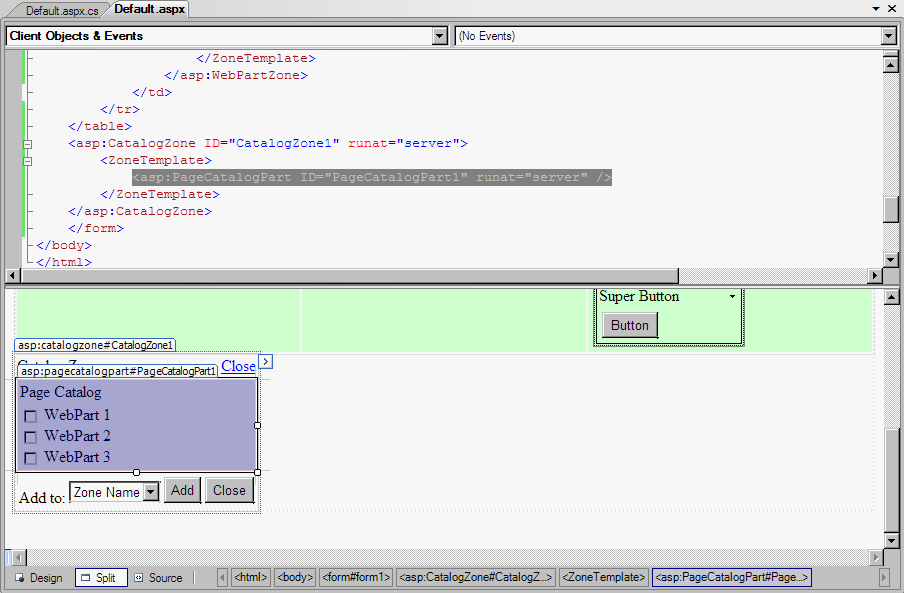
- Add a CatalogZone control to the page. Inside
this new control, place a new PageCatalogPart
control.
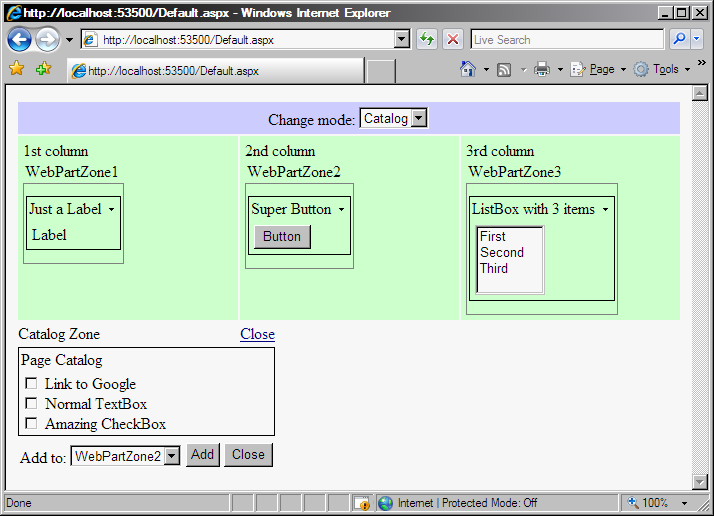
- See it in action: run the page, change mode to Catalog (note,
this is a new mode, available due to existence of the CatalogZone
control). All closed controls are listed in the Catalog.
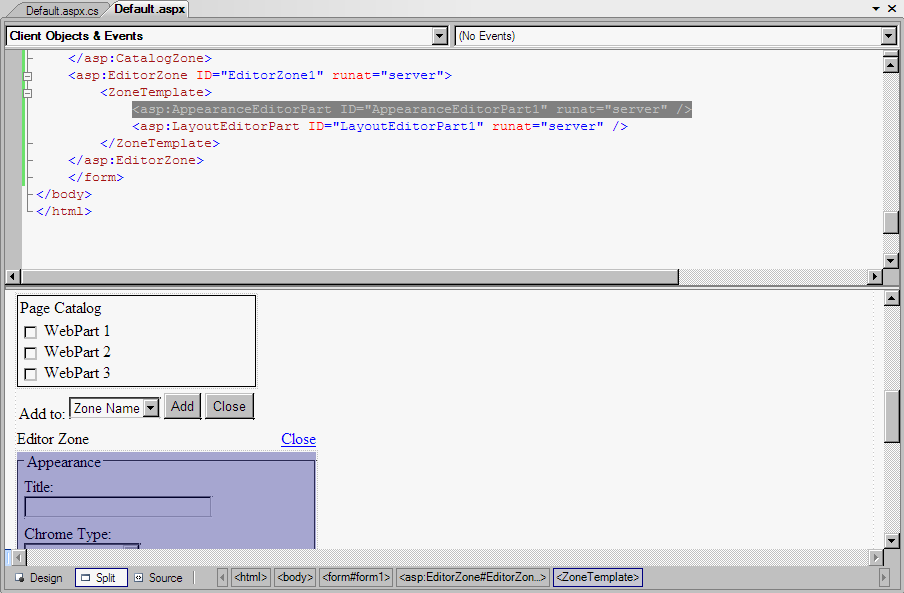
- The Edit mode is available for the user if there an
EditorZone control on the page, so add it to the page:

- It is just a place for editors, to make it functional, some
editors must be added to it. Add an AppearanceEditorPart and
LayoutEditorPart:
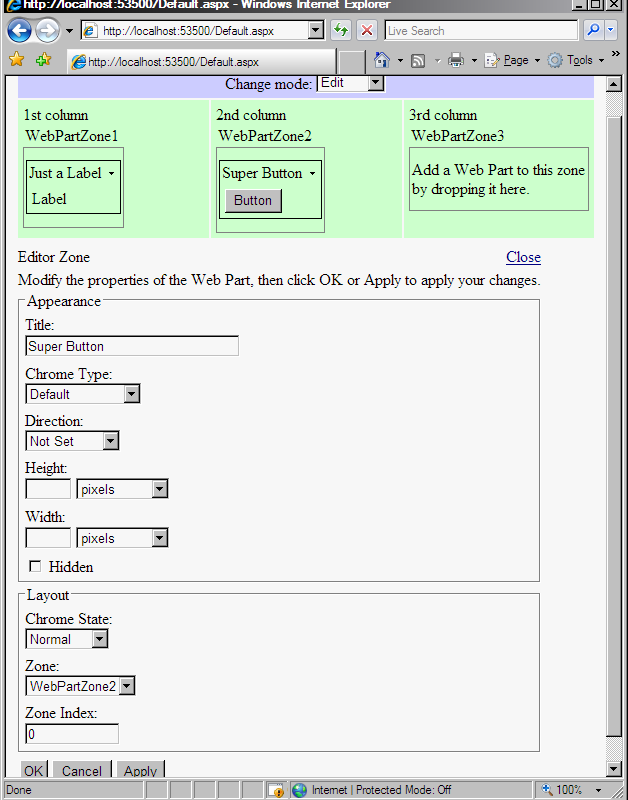
- Run the page. Choose the Edit mode and than click the Edit
option available for a visible control:
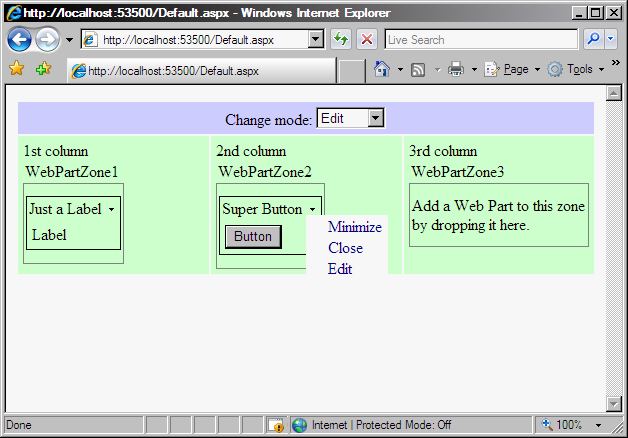
- As a result, the editors appear: